
The minute details make jewelry what it is. The intricacy of the engraving or the cuts of a gemstone is what makes a piece of jewelry unique and amazing. But regular product pictures can easily lose these details. And here is where macro jewelry photography comes in handy.
A macro photography technique enables one to take photos of their jewelry up close such that the viewer can notice more details than would otherwise be visible in a general product photo. v
As an expert jeweler, jewelry designer, photographer, Etsy seller, or jewelry company, learning the fundamental aspects of jewelry macro photography will make all the difference for your images of jewelry.
What Is Jewelry Macro Photography?
Jewelry macro photography is the process of photographing jewelry from an extremely close range.
Macro photography differs from traditional product photography in that it focuses on elements like:
- Facets of diamond
- Inclusions in Gemstones
- Textures Metal
- As told by engravings
- Prongs & settings
- Chain information
- The Craft of the Good Art
- Small decorative features
- Finish – Surface
It’s not just a matter of making the jewelry look larger. “The idea is to make the fine details look crisp, sharp and visually appealing. Jewelers may improve their standard product shots with macro shots. “A regular image can show the overall design, and a macro image can show craftsmanship and quality.
Why is it Important to Have Macro Photography in Jewellery?
Because jewelry products are usually very small in size, buyers have to be certain about the exact item they want to purchase. Here comes macro photography into play.
1. It ShowsFine Details
Macro photos will provide more information than usual photos because they can reveal even the tiniest gems, engraving, texture, and setting features.
2. Quality of workmanship is demonstrated
Photographs can also help demonstrate the quality of a piece of jewelry. Buyers will be able to observe stone setting, metal finishing, and construction of ornaments.
3. Makes product pages more informative
The combination of full-product and close-up images helps customers better understand the item.
4.More Attractive Social Media Content is Created
These images, with all the details of the jewelry highlighted in them, can also be utilized on social media platforms like Instagram for Jewelry.
For more social media tips, read our blog on Instagram for Jewelers.
5. It Helps To Display Premium Jewelry
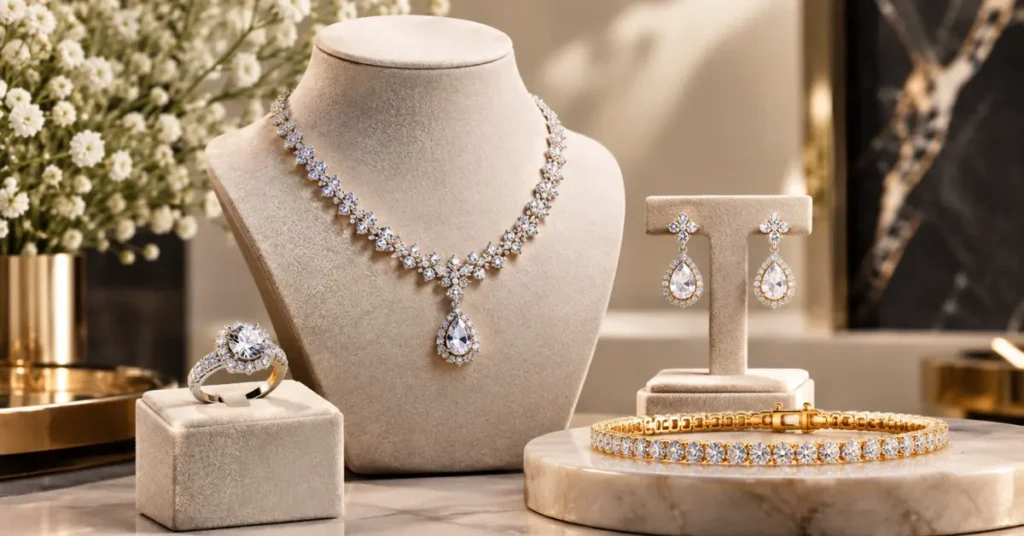
Luxury jewelry often depends on the little details. Macro photography can take those details and make them the subject of the image.
What Gear Do You Need for Macro Jewelry Photography
You don’t need the most expensive camera gear to begin with. Most important is having the equipment that gives you enough magnification, sharpness and control. If you’re using a smartphone, choosing the right device can also make a significant difference. See our guide to Best Smartphone Cameras for Jewelry Photography.
1. Camera
The aperture, shutter speed, ISO, and focusing controls work perfectly on a DSLR or mirrorless camera. However, even with the existing smartphones, one can capture fantastic close-ups of jewelry provided that lighting and set-up are right.If you’re using a smartphone, choosing the right device can also make a significant difference. See our guide to Best Smartphone Cameras for Jewelry Photography.
For jewelry photography.
2. Wide angle lens
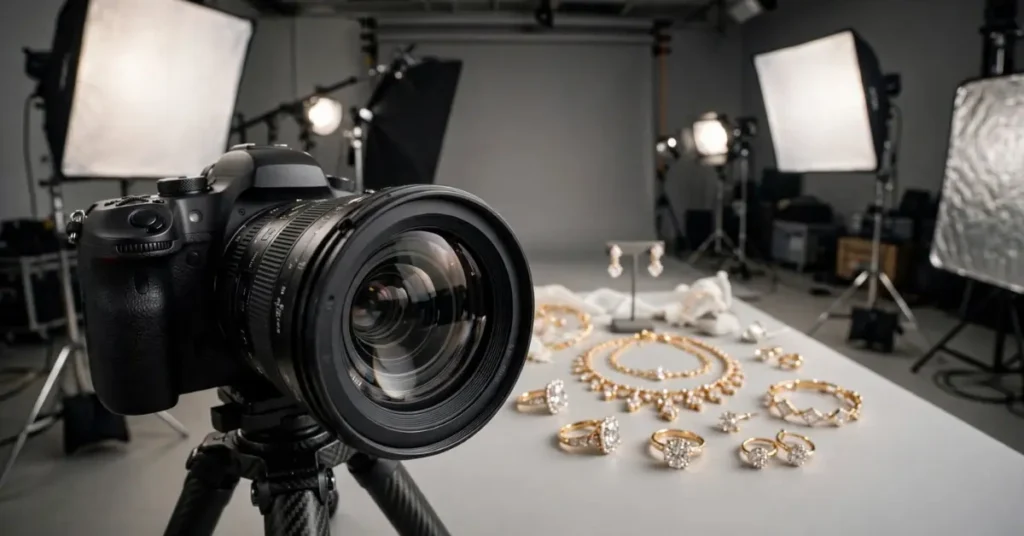
A dedicated macro lens is one of the most useful tools for the professional macro-jewelry photographer.
Common macro focal length settings are:
- 2.36 in
- 90 mm.
- 100 mm
- 105 mm
- 150mm
The preferred choice of lens will be 90 mm or 100 mm because of the quality of details it provides as well as giving one a comfortable distance from the jewelry.
3. Tripod.
The tripod keeps the camera still, minimizing the movement of the camera.
This is very critical when using low shutter speeds and manual focus on small elements.
4. Rail Focus
A focus rail allows for very precise adjustments to the camera position. This is especially useful for focus stacking.
5. Light Source:
Jewelry photography requires good lighting.
You can use:
- LED panels
- Constant lights
- Soft Boxes
- Diffused window light
- Reflectors
- Light tents
Don’t use strong direct light unless you deliberately want strong reflections or shadows.
6. Diffusers and Reflectors
The surfaces of the jewelry pieces are very reflective. A reflector is used to throw light on dark areas while a diffuser softens the harsh lights.
7. Cleaning Instruments
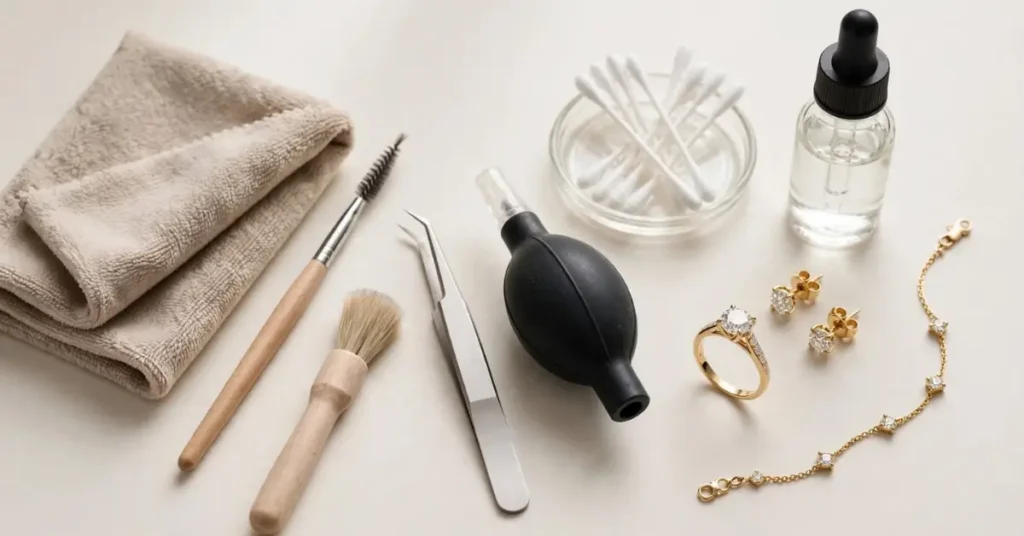
Before taking jewelry photos, remove:
- Palms and finger prints
- DUST.
- The hair
- Smudges
- Loose bits
These flaws are very apparent in macro shots.
How to Set Up Macro Jewelry Photography
The controlled setup makes photographing so much easier.
Step 1: Clean the Jewelry
Start by properly cleaning the piece as per the need of the material and stone used. Always wear gloves while holding polished jewelry to avoid fingerprint marks on it.
Step 2: Pick a Minimalistic Background
A clean background helps to keep the focus on the jewelry. White, gray, black and neutral backgrounds are standard for product photography. The best option depends on the color, finish and style of jewelry.
Step 3: Place the Jewelry
Place the jewelry on the surface securely. You can use a small stand or a positioning tool for rings. For necklaces and bracelets, position the piece in a way that the important details are visible without any unnecessary distractions.
Step 4: Place Your Light
Use a single large, diffused light source. Move the light around the jewelry and watch the reflections change. This is especially evident in highly polished metals because a slight shift in the light’s position will have a huge impact on how the photograph turns out.
Step 5: Set the Camera on a Tripod
A steady camera makes it easier to get sharp focus. If you have to, use a remote shutter or camera timer to reduce movement.
Step 6: Concentrate on the Most Significant Detail
Decide what you want the viewer to see.
For instance:
- Ring center stone focus.
- Look at an engraving.
- Focus on the facets of the stone.
- Try out a unique metal texture.
Don’t try to give equal importance to all parts of the picture.
Macro Jewelry Photography Camera Settings Best
While there is not one particular setting that will apply to all jewelry pieces, the following settings will help you out on your way.
- Aperture (f-number)
- A macro lens allows for a very shallow depth of field.
- Begin about try:
- f/8-f/11.
You can change the aperture depending on your jewelry and how much detail you want in focus. With a broader aperture, you get more pleasing background blur, and a narrower aperture will give you more of the jewelry in focus.
ISO
Use the lowest ISO your situation allows. Generally, a lower ISO will help reduce digital noise and retain fine detail.
Go for it:
- ISO 100-400
ISO 100 is a great place to start for controlled product photography , if you have enough light , and your camera supports it .
Speed of the shutter
You can use a slower shutter speed if you are working with a tripod. This means you can keep the ISO down and the aperture in a good place without having to worry about camera shake when you’re holding it.
Attention
If your jewelry is very detailed, manual focus may give you more control.
Focus precisely on the feature that should be in sharpest focus.
How To Get Jewelry Sharp From The Front To Back
Depth of field is one of the greatest challenges in macro photography. If you take a photo of a tiny object from very close-up there might only be a small area that is in focus. This can be a problem when photographing a ring, gemstone or detailed pendant.
Utilize Focus Stacking
Focus stacking is taking several photos with different focus points and combining them into one image.
For example, you could record:
- One picture was of the front of the jewelry.
- One was for the middle.
- One was on the back.
- Other pictures were taken in specific details.
Then the images can be merged with suitable editing software. The result can be a photo where a lot more of the jewelry appears in focus. Focus stacking is especially helpful for professional jewelry product photography.
How to Make Macro Photos of a Diamond
Diamonds can be especially difficult to work with because they reflect a lot of light and react strongly to it. Bad lighting can also make a diamond look flat, too sparkly or lacking in detail. Immediately after this paragraph How to Make Diamond Photography Easier ko link karein.
Use diffused light
Big diffuse light sources help in making reflections smoother.
Experiment with Light Placement
Move the light a little and watch the reflections of the diamond. Small changes can make a world of difference.
Keep the Diamond Clean
Close up photos of diamonds show fingerprints and dust very well. Always handle the product properly and clean before every shot.
Hold the Camera Still
Even minor camera movements can affect sharpness at macro distances. A tripod is strongly recommended.
Want some more ideas?
Macro Photography of Gemstones
Gemstones come in a variety of colors, transparency levels, cuts and reflective properties so you need to adjust the lighting accordingly. Try different positions and directions of light with transparent gems to show off the facets. Texture and surface characteristics may be seen for opaque stones by side lighting.
Avoid overexposure to light that will bleach the color of the gemstone. The objective is to display the gemstone as faithfully as possible, emphasizing its natural beauty.
Capturing Texture in Jewelry
Texture is one area where macro photography can be particularly effective.
You can shoot: 1.
- Embossed Metal
- Brushed metal
- Engraved surface
- Filigree.
- Beading details
- Oxidation finishes
- Gold Textured
- Gemstones Carved
Instead of putting the light directly above the jewelry, angle it. Side lighting can produce subtle shadows that make texture easier to see. If you are a jewelry maker seeking to add texture to your work, check out our guide, Affordable Tools for Adding Texture to Jewelry.
Jewelry Macro Photography Lighting Tips
Lighting is essential in a macro jewelry photograph.
Use Big Light Sources
Polished surfaces tend to reflect light more smoothly when the source is larger.
Harsh Light – Diffuse
Diffusion can help to control bright highlights and unwanted reflections.
Use several reflectors
Small reflectors can fill in dark spots without adding another light.
Beware Your Image
Remember that shiny jewelry will nearly act as a mirror. Reflections can be your camera, your hands, lights and things around you. Before taking the final photograph, check the jewelry for unwanted reflections.
Common Errors in Macro Jewelry Photography
1. Overuse of Magnification
Getting extremely close is not always good. A lot of magnification is tough to focus and will make small imperfections look bigger. For more general photography problems, see our guide to Jewelry Photography Mistakes.
2. Disregard Dust
A tiny speck of dust can look huge in a macro shot. Always check the jewelry before shooting.
3. Harsh Use of Flash
Direct flash can produce distracting highlights and unnatural reflections.
4. Shooting Without a Tripod
Small camera movements blur sharpness.
5. Too Much of a Good Thing
Jewelry that is too sharp, too bright in color, or too clear can look artificial. Editing should enhance the photo, not misrepresent the product.
6. Targeting the Wrong Area
A photo where the most important detail is out of focus loses its purpose. Choose your point of interest before you press the shutter.
7. Using a Distracting Background
A busy background can compete with the jewelry. Unless your creative concept specifically calls for it, don’t go overboard in the background.
How to Edit Macro Jewelry Photos
Professional jewelry photography is not complete without post-processing.
You can change:
- Exposure
- White balance
- Compare
- Features
- Shadows.
- Clarity of picture
- Crop.
- Color Fidelity
But don’t make changes that alter the actual look of the jewelry. For example, too much saturation can change the look of a gemstone quite a bit from the real product.
Online Store Macro Jewelry Photography
Macro images are especially useful for online jewelry stores where customers cannot touch the product before buying.
You might want to include a few image types:
- Primary product image
- Shows the entire jewelry item.
Image Detail
Point out a special feature such as a gemstone, engraving or setting.
Scale Image
Indicates the approximate size of the jewelry.
Lifestyle Image
Shows the jewelry in use or worn in a realistic environment.
Macro photo
Shows workmanship and fine detail. This combination helps customers to have a more complete visual understanding of the product.
Macro Jewelry Photography for Pinterest & Instagram
Close-up images of jewelry can also be useful for visual marketing.
Macro photos for Instagram you can use for:
- Product launches
- Behind the scenes posts
- Detail-oriented carousels
- IG Reels
- Educational posts.
- Craftsmanship tales
Close-up photos are great for Pinterest as supporting visuals for educational content and for product inspiration. You can read more about it in our guides to Instagram vs. Pinterest for Jewelry Businesses and Pinterest Marketing for Jewelry Brands.
Macro Jewelry Photography Using a Smartphone
You don’t need a special camera to try your hand at macro jewelry photography. A lot of today’s smart phones have macro modes or cameras for taking close-ups.
For better results :
- Wipe the camera lens clean.
- Use strong, but diffused, light.
- Steady the phone.
- Tap to zoom on the jewelry.
- Don’t go overboard on digital zoom.
- Keep the background clean.
- Try a few from different angles.
Read Top 5 Smartphone Jewelry Photography Hacks for more tips on smartphone photography.
How to Make Macro Jewelry Photography Professional
The gear can be pricey but is usually less important than control for professional-looking images.
Concentrate on these basics:
Clean jewelry + controlled lighting + stable camera + precise focus + accurate editing = improved macro jewelry photography.
Get several pictures, not just a shot. Consider different lighting angles, focus points and compositions before choosing the final image.
Additional Tips for Better Macro Jewelry Photography
Before you publish your photos, see the following:
- Is the jewelry totally clean?
- Is the main detail crisp?
- Is the color correct?
- Do unwanted reflections get controlled?
- Background distraction?
- Does the contrast work?
- Are the gemstones depicted accurately?
- Is that the image of craftsmanship?
- Have you held back from overcorrection?
- Will the image look good at the size it will be used at?
A little better in each of these can make a big difference.
Summary
More Attractive Social Media Content is Created. These images, with all the details of the Macro Jewelry Photography highlighted in them, can also be utilized on social media platforms like Instagram and Pinterest.
Frequently Asked Questions
Can I use focus stacking while taking pictures of jewelry?
Yes. You can use focus stacking if you want a little more of a jewelry piece to be sharp. You take a series of pictures at different focus points and combine them in editing.
How to shoot close up diamond photos?
Best Lighting is controlled, diffused lighting. Keep the diamond clean, stabilize the camera and play with the position of the light to make attractive reflections that keep the details of the diamond.